How to pack your webpack.
Photo by Lina Verovaya on Unsplash
Our example app:
React
TypeScript
Step 1:
Create the config
Create webpack.config.ts...
...wait... what? 🧐
That's right: you can use TypeScript in your webpack config.
-
Use the
.tsfile extension. -
Install
typescript@types/webpackandts-node. -
Add this to your
tsconfig.json:{ "compilerOptions": { "esModuleInterop": true } }
-
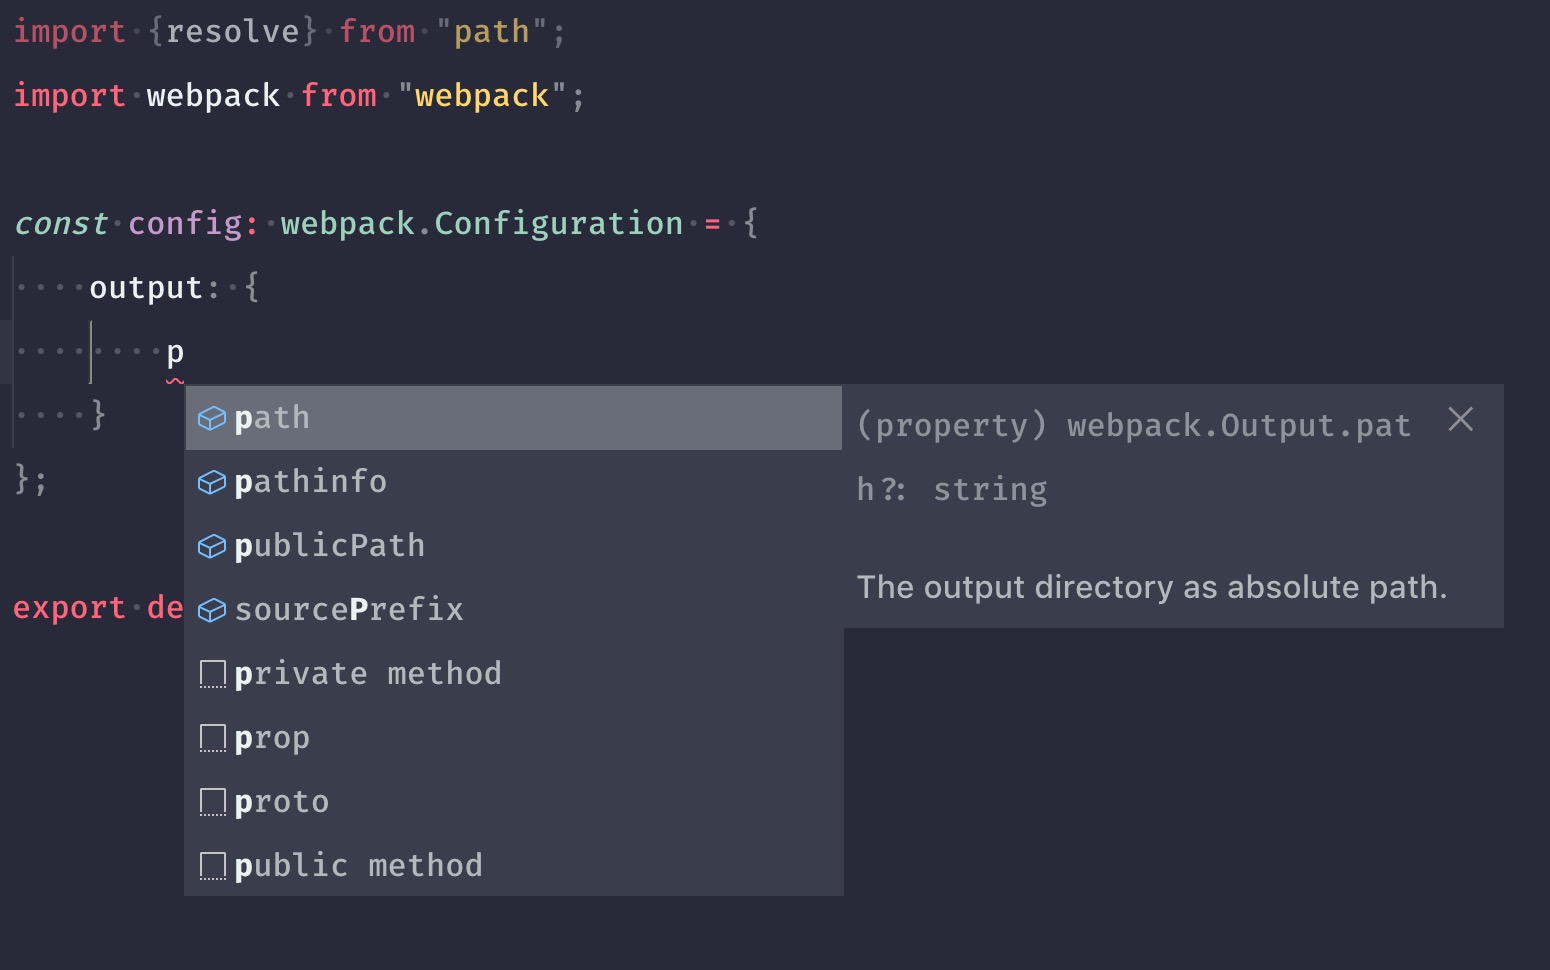
Create a variable using the
webpack.Configurationtype.import webpack from "webpack"; const config: webpack.Configuration = { // ... }; export default config; - Profit 😎
Step 2:
Turn that config into a function
                            const config: webpack.Configuration = {
                                // ...
                            };


                            export default config;
                            const createConfig = () => {
                                const config: webpack.Configuration = {
                                    // ...
                                };

                                return config;
                            };

                            export default createConfig;
Step 3:
Make the mode configurable.
                            const createConfig = () => {
                                const config: webpack.Configuration = {
                                    // ...
                                };

                                return config;
                            };
                            const createConfig = (env) => {
                                const config: webpack.Configuration = {
                                    // ...
                                };

                                return config;
                            };
                            const createConfig = ({mode}) => {
                                const config: webpack.Configuration = {
                                    mode,
                                };

                                return config;
                            };
                            const createConfig = ({mode = "production"} = {}) => {
                                const config: webpack.Configuration = {
                                    mode,
                                };

                                return config;
                            };
Webpack has three different modes to enable the following default configurations:
| development |
No bundle optimizations, such as
minification and tree shaking, but with
developer tool support.
process.env.NODE_ENV is set
to "development" which
switches some modules (such as React)
into development mode.
|
| production |
All bundle optimizations enabled, but no
developer tool support by default.
process.env.NODE_ENV is set
to "production".
|
| none | Disable any default configuration. |
The mode applies defaults. You can
always override them...
...but the default configuration is often good enough for a lot of applications. Only override them if you know what you're doing.
                            "scripts": {
                                "build": "webpack",
                                "dev": "webpack --env.mode=development"
                            }
Step 4:
Set your entry
- Points to the module where webpack will start to build its module graph
- webpack will figure out all dependencies that this entry point depends on
                            const config: webpack.Configuration = {
                                mode,

                            };
                            const config: webpack.Configuration = {
                                mode,
                                entry: require.resolve("./src/start.ts"),
                            };
Step 5:
Set your output
- Controls where webpack will write the assets to
- Allows to configure filenames and such
                            // ...


                            const config: webpack.Configuration = {
                                // ...
                                output: {


                                }
                            };
// ...
const config: webpack.Configuration = {
// ...
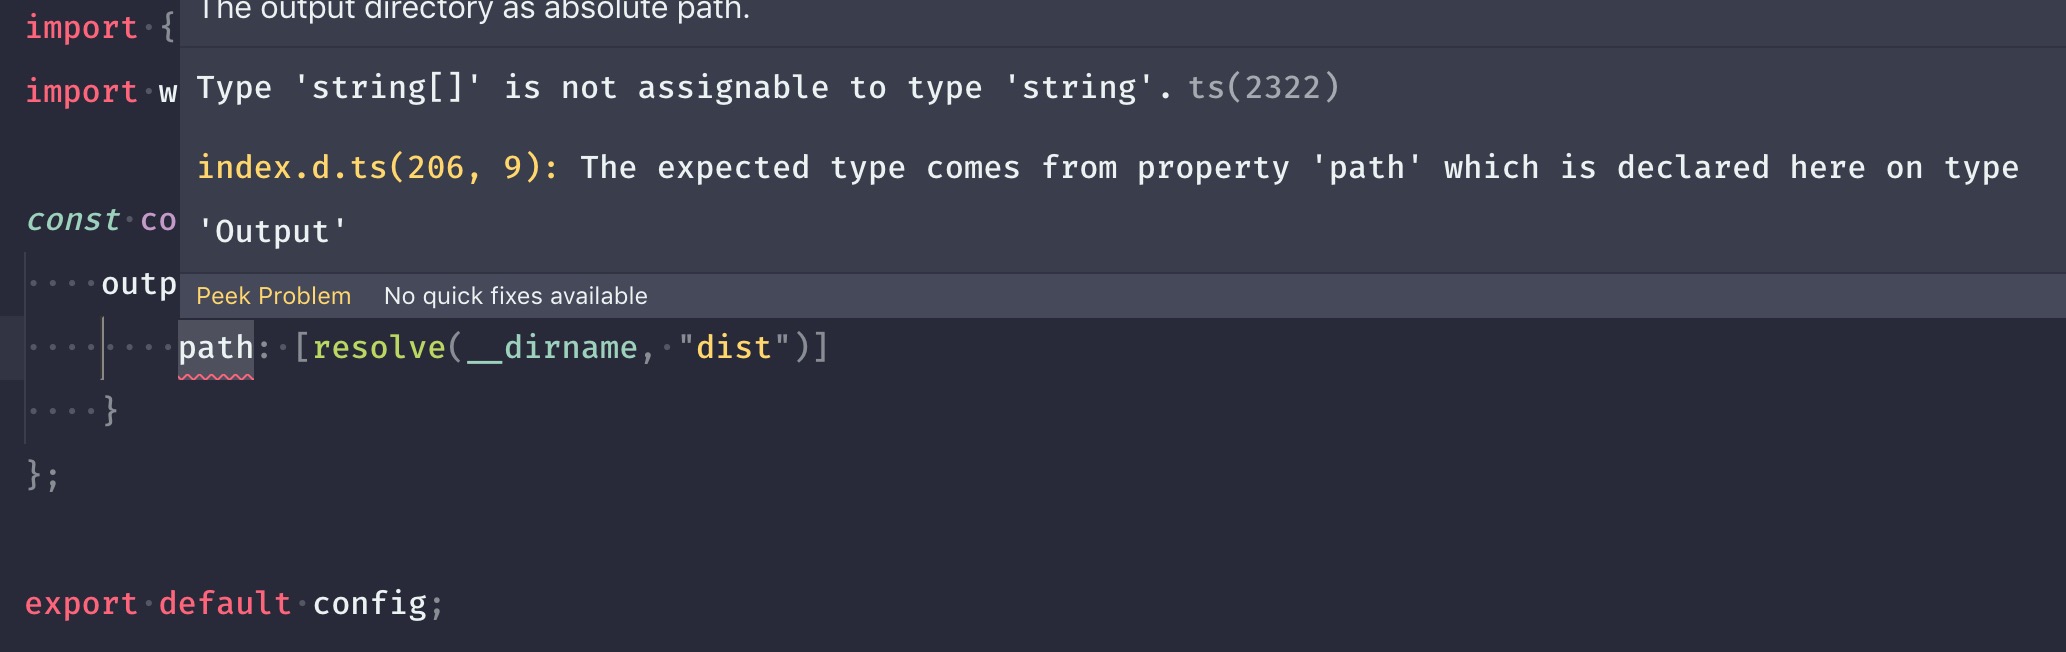
output: {
path: path.resolve(__dirname, "dist"),
}
};
                            // ...


                            const config: webpack.Configuration = {
                                // ...
                                output: {


                                }
                            };
                            // ...
                            const isDev = mode === "development";
                            const outputFilenamePattern = isDev ? "[name].js" : "[name].[contenthash].js";
                            const config: webpack.Configuration = {
                                // ...
                                output: {
                                    filename: outputFilenamePattern,
                                    chunkFilename: outputFilenamePattern,
                                }
                            };
🛠 In development
main.jsposts.jsabout.js🎬 In production
main.7f78047c8cc5f42081dd.jsposts.6d780j728dc5f42l87gd.jsabout.8lss01xc87f3ga28ks6d.js
Step 6:
Set up babel-loader
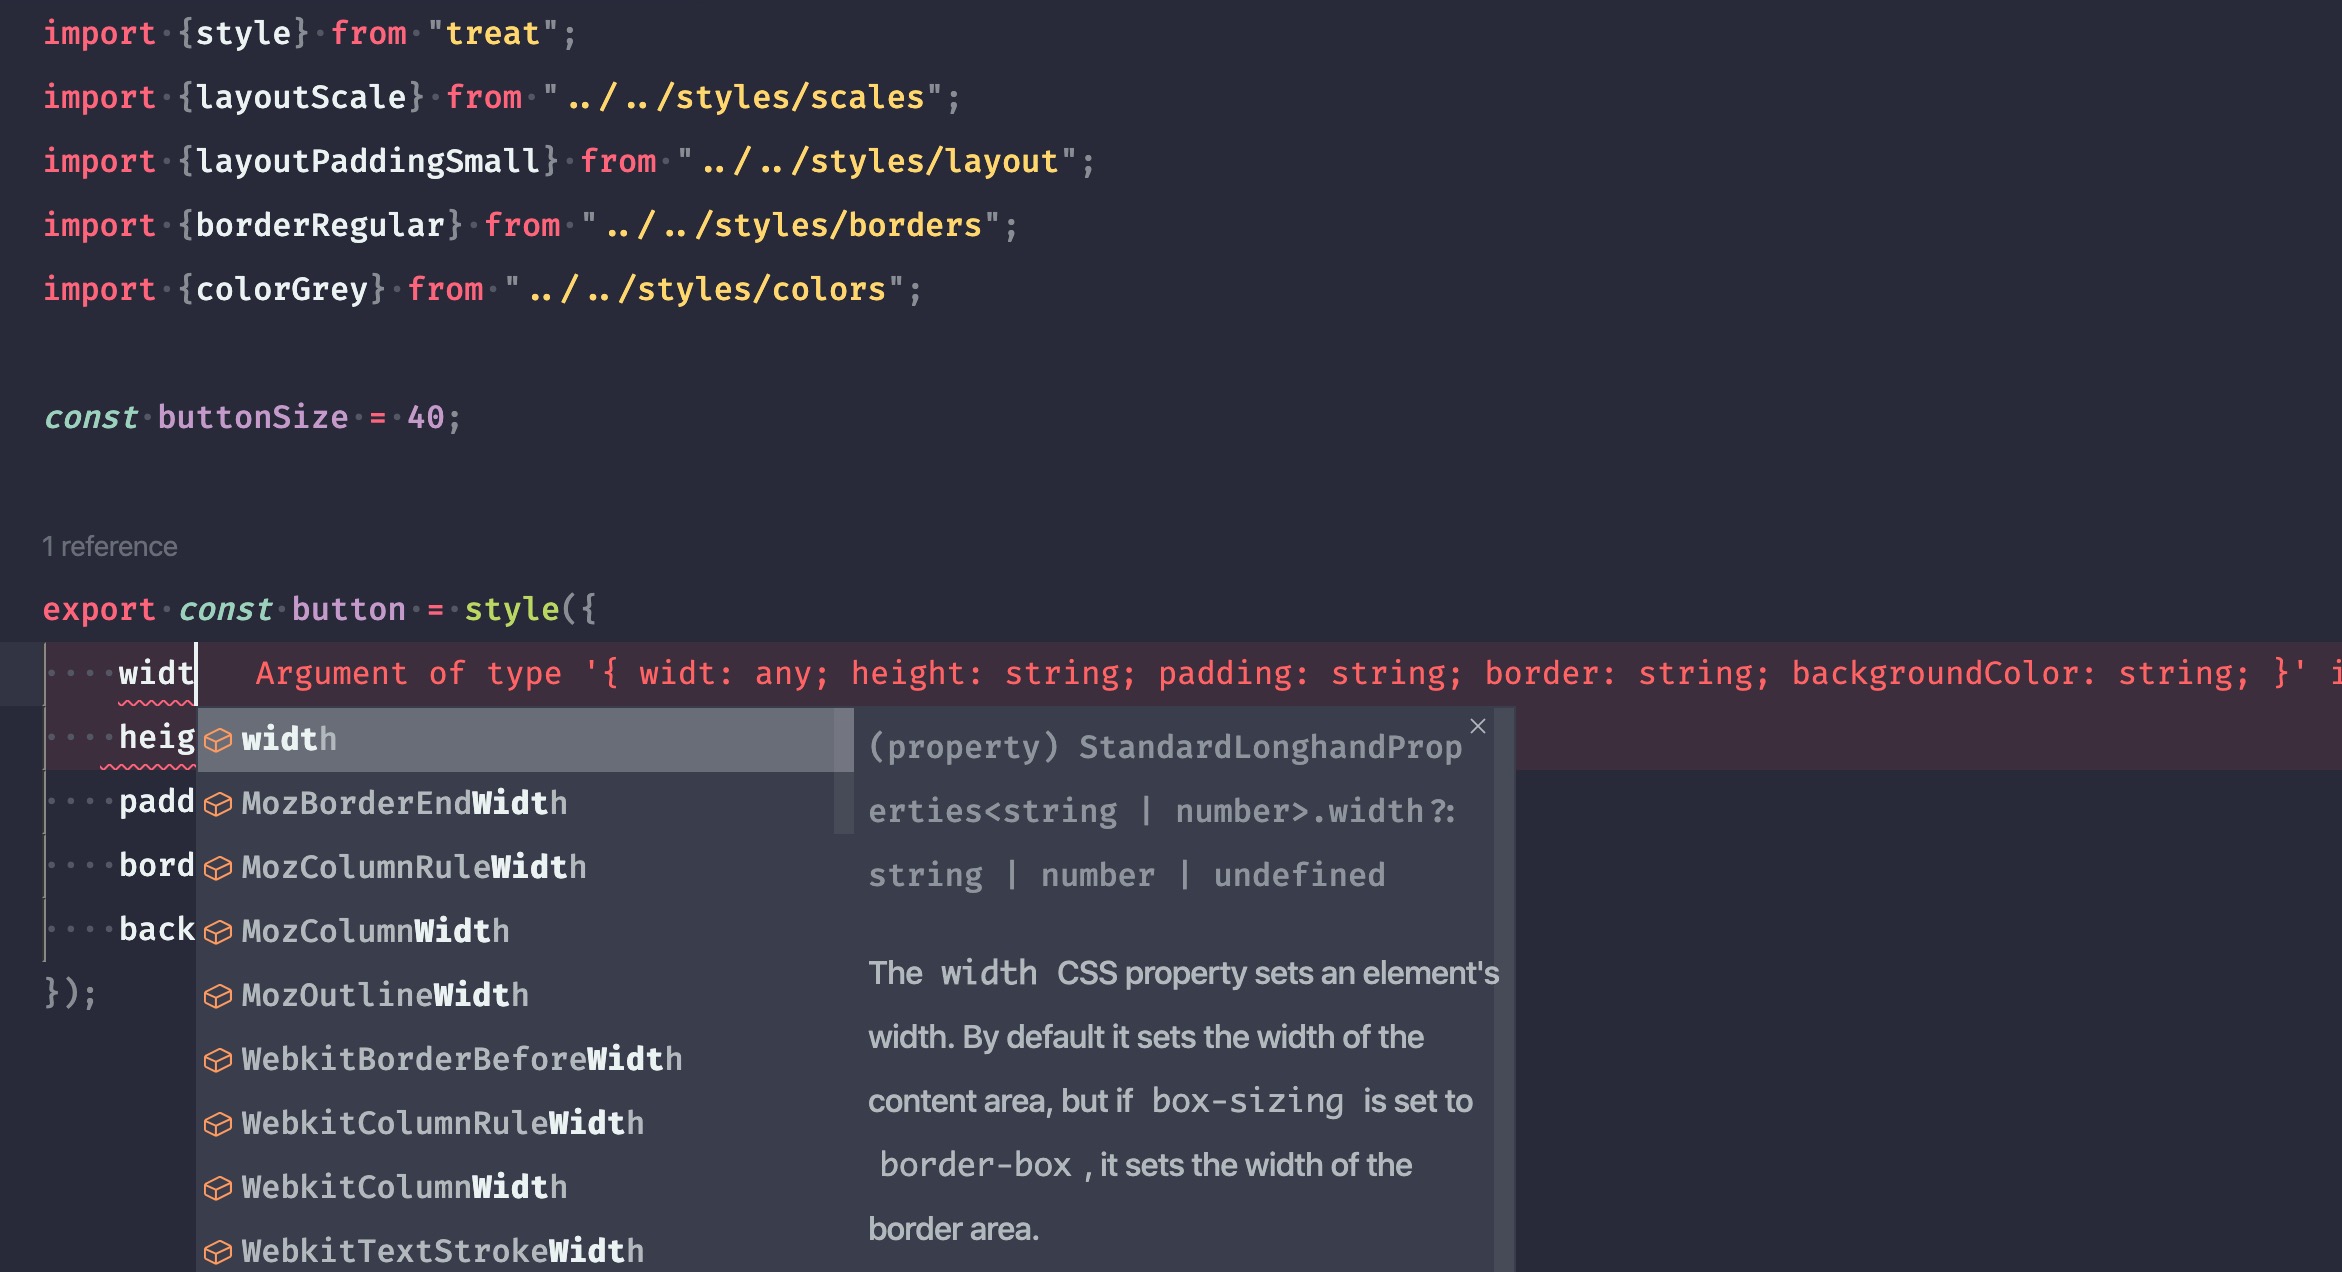
Wait... isn't this a TypeScript project? 🧐
Aren't we supposed to use the ts-loader then?
You can ...
...but @babel/preset-typescript works also pretty good.
@babel/preset-typescript...
-
...doesn't work with
const enums and there are other minor differences (see caveats) - ...doesn't do any type checks
- ...just removes the type information
🙀
NO TYPE CHECKS???Isn't that the point of using TypeScript?
It is, but...
...do we need to check the types during a webpack build?
...do we need to lint our code during a webpack build?
How to speed up your webpack build
Do less.
Thanks for coming to my TED talk.
~40s
~12s
Just by dropping eslint-loader
- IDEs should show type and linting errors
- It should always be possible to create a development build, despite of type and linting errors
-
Types and linting should be checked and enforced during
posttest
                                oneOf: [
                                    {

                                        loader: "babel-loader",


                                    },
                                ],
                                oneOf: [
                                    {
                                        test: /\.tsx?$/,
                                        loader: "babel-loader",


                                        },
                                    },
                                ],
                                oneOf: [
                                    {
                                        test: /\.tsx?$/,
                                        loader: "babel-loader",
                                        options: {
                                            presets: [
                                                "@babel/typescript",
                                                "@babel/react",
                                            ],
                                        },
                                    },
                                ],
How to speed up your webpack build
(now for real)
                                oneOf: [
                                    {

                                        test: /\.tsx?$/,
                                        loader: "babel-loader",
                                        options: {
                                            // ...

                                        },
                                    },
                                ],
                                oneOf: [
                                    {

                                        test: /\.tsx?$/,
                                        loader: "babel-loader",
                                        options: {
                                            // ...
                                            cacheDirectory: true,
                                        },
                                    },
                                ],
                                oneOf: [
                                    {
                                        include: [path.resolve(__dirname, "src")],
                                        test: /\.tsx?$/,
                                        loader: "babel-loader",
                                        options: {
                                            // ...
                                            cacheDirectory: true,
                                        },
                                    },
                                ],
- Use
testfor file extensions - Use
includefor directories and absolute paths
rules: [{
    include: [
        path.resolve(__dirname, "src"),

    ],
    test: /\.js$/,
    use: ["babel-loader"],
}],
rules: [{
    include: [
        path.resolve(__dirname, "src"),
        path.resolve(__dirname, "node_modules", "modern-module-b"),
    ],
    test: /\.js$/,
    use: ["babel-loader"],
}],
Step 7:
Set up @babel/preset-env and use a .browserslistrc
🎯 Goal
- We want a single place for configuring our target browsers
- All other tools should use that configuration
- We only want to include the necessary polyfills
                            // babel-loader options
                            presets: [
                                "@babel/typescript",
                                "@babel/react",
                                [
                                    "@babel/env",


                                ],
                            ],
                            // babel-loader options
                            presets: [
                                "@babel/typescript",
                                "@babel/react",
                                [
                                    "@babel/env",
                                    {
                                        modules: false,

                                    },
                                ],
                            ],
                            // babel-loader options
                            presets: [
                                "@babel/typescript",
                                "@babel/react",
                                [
                                    "@babel/env",
                                    {
                                        modules: false,
                                        useBuiltIns: "usage",
                                    },
                                ],
                            ],
Now let's create a .browserslistrc file in our project root.
.browserslistrc
- specifies all browser versions that need to be supported
- are recognized by a lot of tools, such as Babel and PostCSS
-
is a text file that contains a browserslist query:
last 2 versions, not dead, IE > 8
That's nice for production builds...
...but do we want to do that in development builds as well? 🤔
No.
last 2 versions, not dead, IE > 8
[production]
last 2 versions, not dead, IE > 8
[production]
last 2 versions, not dead, IE > 8

[development]
last 1 Chrome version, last 1 Firefox version
                            const config: webpack.Configuration = {
                                // ...
                            };


                            return config;
                            const config: webpack.Configuration = {
                                // ...
                            };

                            process.env.BROWSERSLIST_ENV =
                                process.env.BABEL_ENV = isDev ? "development" : "production";

                            return config;
This may speed up the build a little bit...
...but more importantly it improves debuggability!
Features like async/await can be annoying to debug in transpiled code.
Step 8:
Set up a CSS solution
There are a lot of different solutions, but my general advice is:
Embrace
JavaScript
as your
CSS preprocessor!
(aka CSS-in-JS)
CSS-in-JS in combination with the mini-css-extract-plugin theoretically allows us
-
to extract a CSS file per chunk.
No giant
main.cssfile! 💪 -
to do tree-shaking for styles.
No unused styles! 💪
There are many great CSS-in-JS solutions, most notably:
but most of them come with a runtime cost 😰
Which is why I prefer:

Step 9:
Configure bundle optimizations
We won't go much into detail because every app is different.
But these are my general tips:
mode: "production" is good enough for most apps
Use dynamic import() 🙏
- Routes
- Modals
- Popups
- Interactive elements like maps, editors,...
...should be lazy-loaded via import().
You can tell Webpack to prefetch chunks via
<link rel="prefetch">:
import(/* webpackPrefetch: true */ "./popup.js")
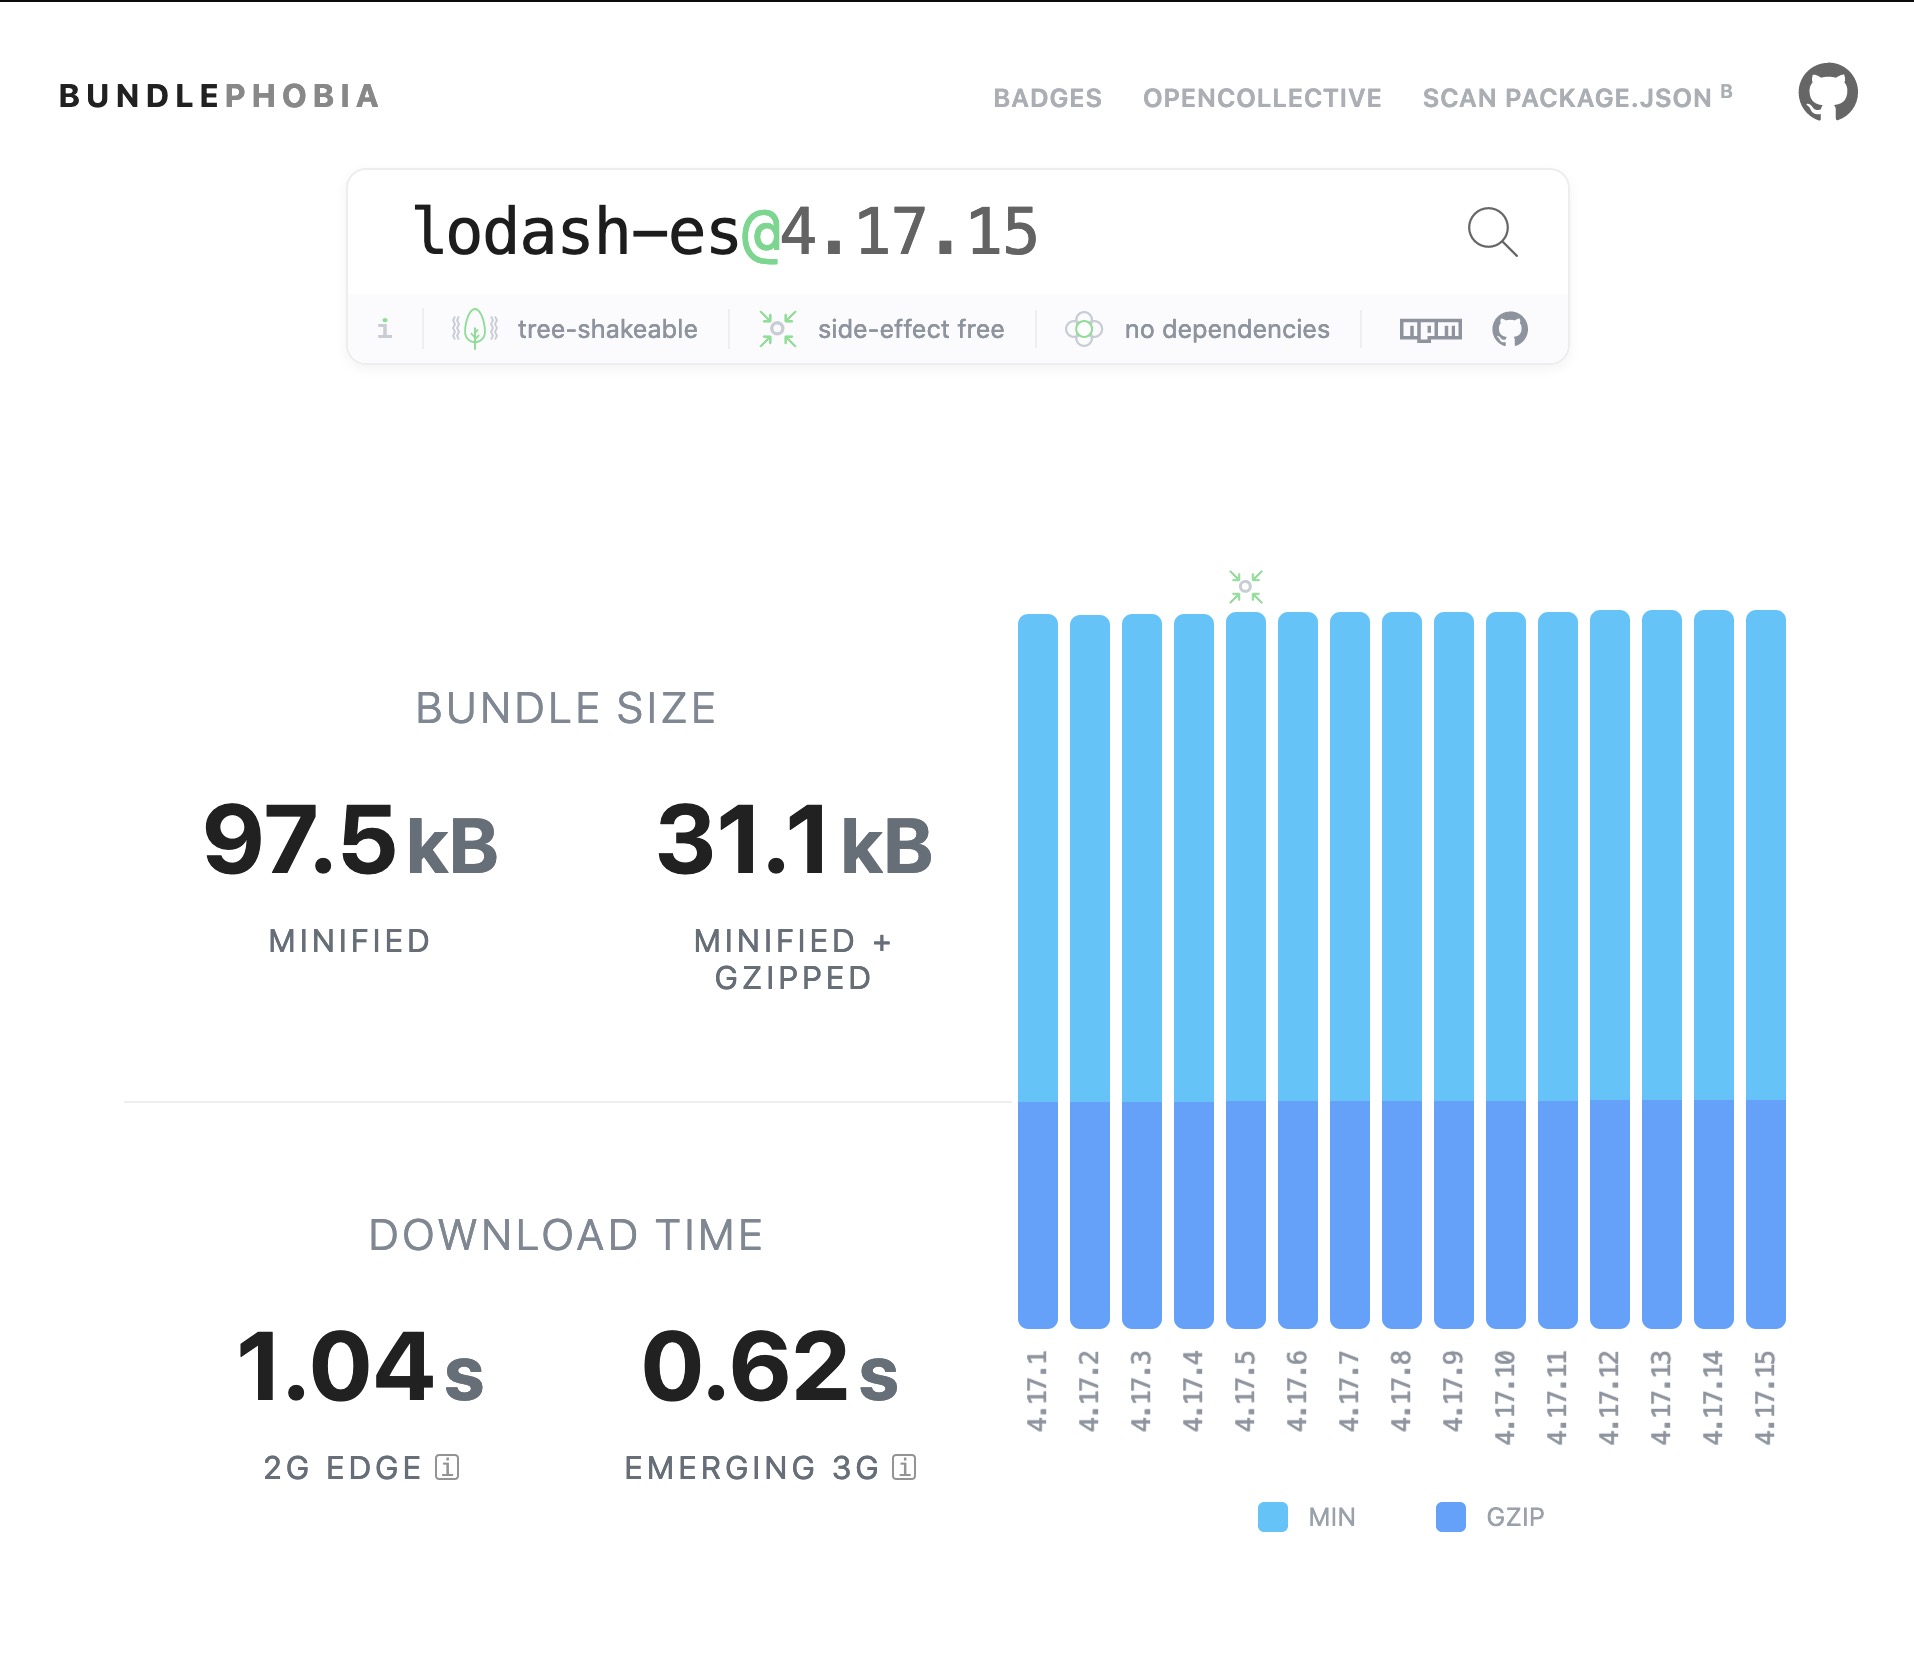
Check what you're importing:
https://bundlephobia.com
Don't forget to measure!
-
Fine-tuning
optimization.splitChunkswithout measuring makes no sense - Use user-centric performance metrics like time to first meaningful paint (TTFMP)
- Use Lighthouse
Don't overestimate long-term caching.
- Effective long-term caching of JS assets is hard
- The sad reality is: Most JS content hashes will change after every deployment
- It's hard to maintain a constant chunk layout across multiple builds
- We still don't know how effective long-term caching is in real-world apps
- How often are files served from cache? (e.g. mobile devices tend to purge their cache more often)
- There is not a lot of public research about it
Long-term caching for fonts, images and CSS is often good enough 🤷♀️
Minify your CSS
- webpack only minifies JavaScript by default
- You can use the optimize-css-assets-webpack-plugin
- treat does this by default
🔑 Key takeaways
- You can use TypeScript in your webpack config
- A webpack config can be a function
-
webpack has good defaults for
developmentandproduction -
Use
-
✅
testfor file extensions -
✅
includefor paths
-
✅
-
Use
cacheDirectory: truein your babel-loader options
-
Use a
.browserslistrc - Transpile as less as possible in development
-
Do less to speed up your webpack build:
- ❌ No type checks
- ❌ No linting
- CSS-in-JS provides good DX and allows many optimizations
- Don't optimize without measuring
-
Ship less initial code by using dynamic
import() - Minify your CSS
If you don't like to configure that for yourself:
- React create-react-app
- React Next.js
- Vue Vue CLI
- Vue Nuxt.js
- Angular Angular CLI
- Razzle
- Parcel 🤷♀️


